ORBI PRO QUICK GUIDE SETUP
INSTALLATION SETUP (WEB BROWSER SETUP)
1) Connect your computer or mobile device to the Orbi Pro Router with an Ethernet or WiFi connection:
(a) Ethernet – Use an ethernet cable to connect your computer to the Orbi Pro router LAN ports.
(b) WiFi – Use preassigned WiFi network name (SSID) and password on the label of the Orbi Pro router to connect to the Orbi WiFi network.
2) Launch a web browser and type orbilogin.com in the address field. Click agree to proceed.


(3) Setup your Orbi Pro Satellites – your Orbi Pro Satellites will automatically be detected. Proceed to the setup button and wait for the Orbi Pro Router to sync with the satellites.


(4) Admin Account Settings – fill in your “admin” password for your Orbi Pro Router and select the security question. Please remember these information details in case you forgot your “admin” password. The security question will help you reset your password in case you had forgot it.

(5) Setup your WiFi – fill up the information. This will be your WiFi SSID and password. Click next button after you finish the configuration.

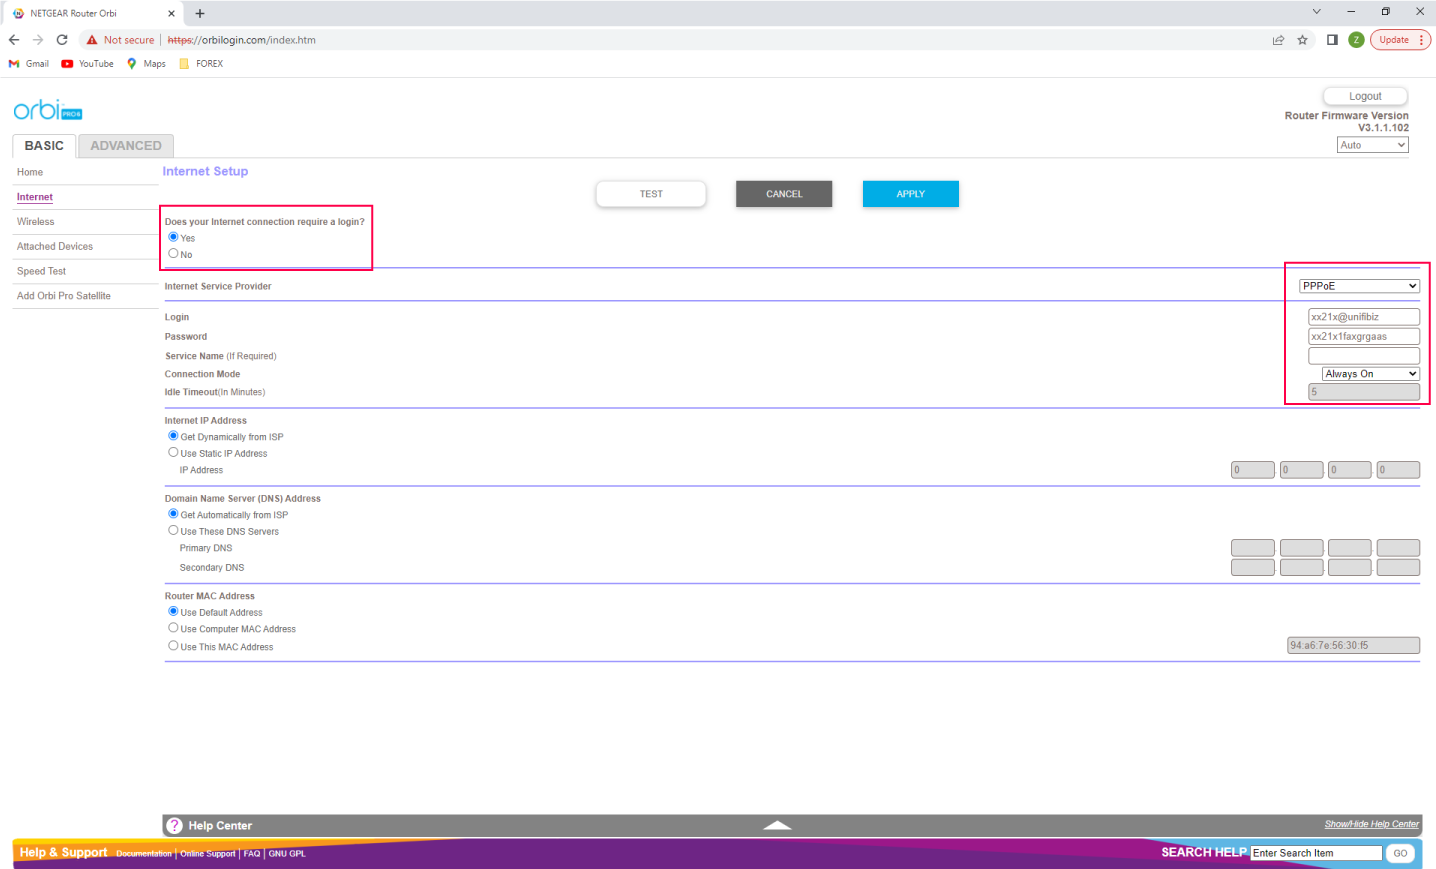
(6) Setting up your Internet connection:
(a) If your connection running on DHCP mode, you can skip to the wireless setting. Orbi Pro Router is already on DHCP mode by default.
(b) If your connection running on PPPoE, click yes and fill in your PPPoE login and password. On the connection mode, choose Always On. Click APPLY.
(7) Setting up your Wireless WiFi SSID (multiple SSID)
(a) Select Wireless 2 and Wireless 3 to setup your multiple SSID. Fill in your Wireless Network Name and Password. You can throttle your WiFi speed for each SSID by enable the Bandwidth per SSID and move the balloon to adjust the percentage of the download speed. Each of SSID can tag using a different VLAN to segregate your network IP address group.

Example of the access over WiFi connection with VLAN ID profile.
|
VLAN Profile |
VLAN ID |
Internet Access |
Network Access |
DHCP IP Address |
|
Employee |
20 |
Yes |
No |
192.168.20.1 255.255.255.0 |
|
Guest |
30 |
Yes |
No |
192.168.30.1 |
|
IT Dept |
10 |
Yes |
Yes |
192.168.1.1 |
(b) Select Guest Portal if you need to enable your WiFi Network for your Guest. You can tag a different VLAN to avoid any guest to access your internal network. By assigning a different VLAN, guest WiFi will have limited access over your WiFi connection. You can throttle the bandwidth by Enable Bandwidth per SSID and move the balloon to adjust the percentage of the download speed.

(8) Setting up your VLAN. Go to ADVANCED Advance Setup VLAN/Bridge Settings.
(a) Create your ISP VLAN by adding the VLAN profile value on the table. Click ADD button on the bottom center to key in your VLAN NAME and VLAN ID. Edit VLAN Profile on the Base.
(b) You can edit the rest of the VLAN ID and Name by going to each of the value to determine your VLAN setting. Click APPLY.

|
Internet Service Provider |
VLAN ID |
|
UNIFI |
500 |
|
MAXIS FIBRE |
621 |
|
DIGI FIBRE |
629 |
|
CELCOM FIBRE |
623 |
|
VIEWQWEST FIBRE |
624 |
|
VLAN Profile |
VLAN ID |
|
Employee |
20 |
|
Guest |
30 |
|
IT Dept |
10 |
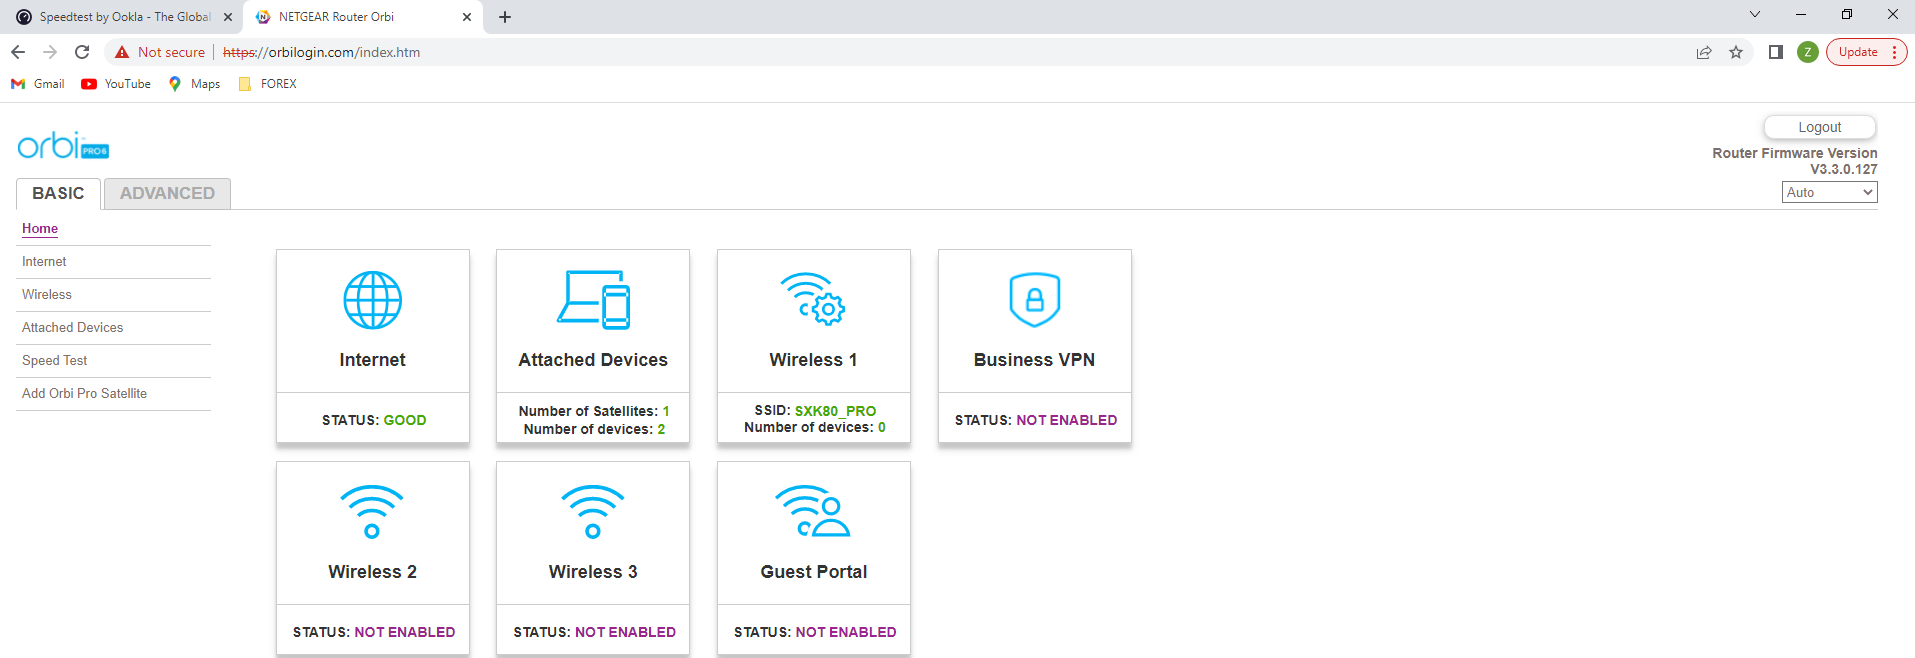
(9) Check your Internet connectivity. The Internet status will indicate GOOD and Internet Port will be showing IP Address. You good to go 😊

(10) Netgear Insight App. To monitor your Orbi Pro network, you can use the NETGEAR Insight app. Download the NETGEAR Insight app from the Apple App Store or Google Play Store. Launch the NETGEAR Insight app on your mobile device and follow the prompts. Monitor your total clients on your network, change your WiFi networks, DHCP Servers or current Traffic from your mobile device.

